Using Progress & Plan
The [Progress & Plan] page is an overview of your whole classroom at a glance. In this article, we'll talk about how to:
- Navigate the Progress & Plan Page
- Record Presentations and Update Children's Progress
- Flag Lessons You Plan to Give
Read on for more details, or watch this brief tutorial video:
Navigating the Progress & Plan Page
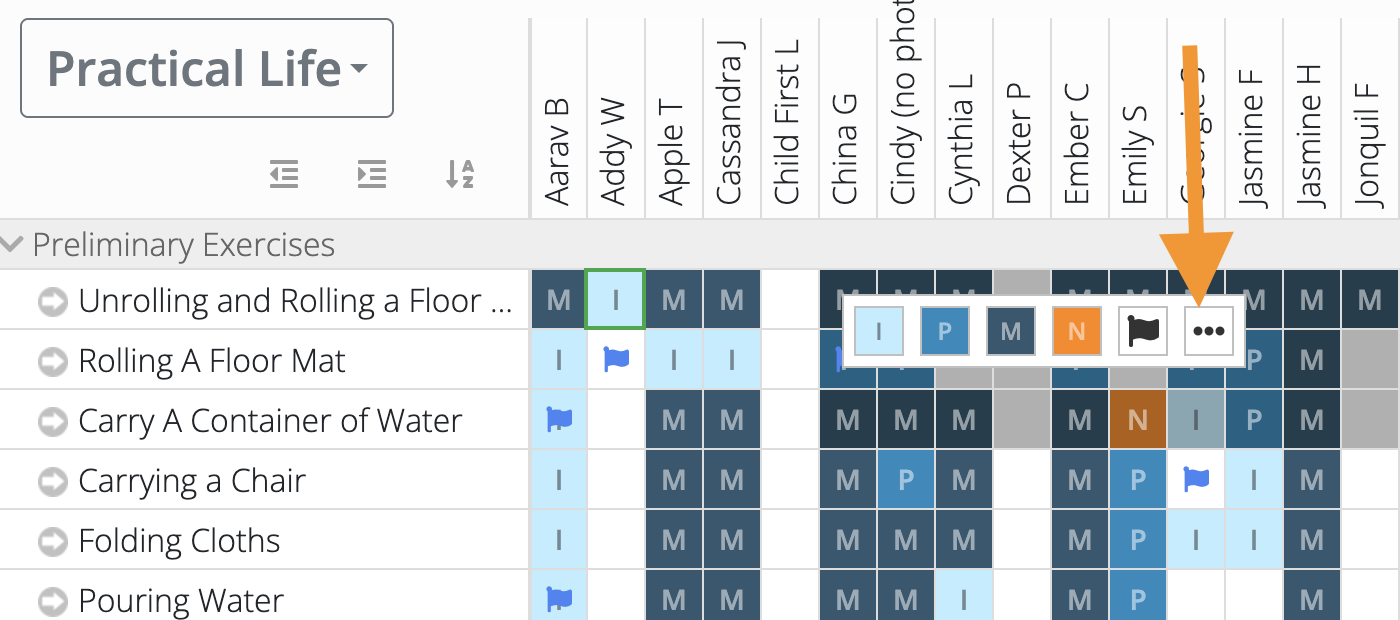
You can find the [Progress & Plan] page just below the [Activity] Page on the sidebar. Here, you can see all of the areas in your lesson set, and the lessons in the area listed down the left-hand side of the page. The children in your classroom are arranged, by default, from oldest to youngest at the top of the page. You can use the icons to reorganize the children and collapse or expand the lessons.

In each square, child progress is color-coded to your lesson scale and keywords. Find the key in the bottom left corner of the page and click to expand. The default settings are Introduced, Practiced, Mastered and Needs More, but you can update the keywords to match your album or training background with up to six different levels of progress.

Recording Presentations, Updating Progress
On the [Progress & Plan] page, you can record children's progress with a single click. Continuing to click will cycle you through the different levels of progress until you come back to blank. You can also right-click or command + click to see a menu with all the options. Or, on an iPad or other tablets, use the "Long Press" option by holding your finger on the square.

In addition, on a laptop or desktop computer, you can update the progress of multiple children by clicking and dragging to select a group.

When you’re done, [Save] your changes! After you save, every lesson you recorded will generate an observation that you can view on your [Activity] page.
Edit or Delete a Record
If you save a lesson by mistake, or if you'd like to edit the record entry to add more information or make it available or locked to parents, right-click to open the menu, and select the ellipsis [...].
This will open a window with all the observations connecting the child and the lesson. Click on the ellipsis for the record you'd like to update. If you decide to select [Delete], once you delete the generated observation, the square will revert to blank.
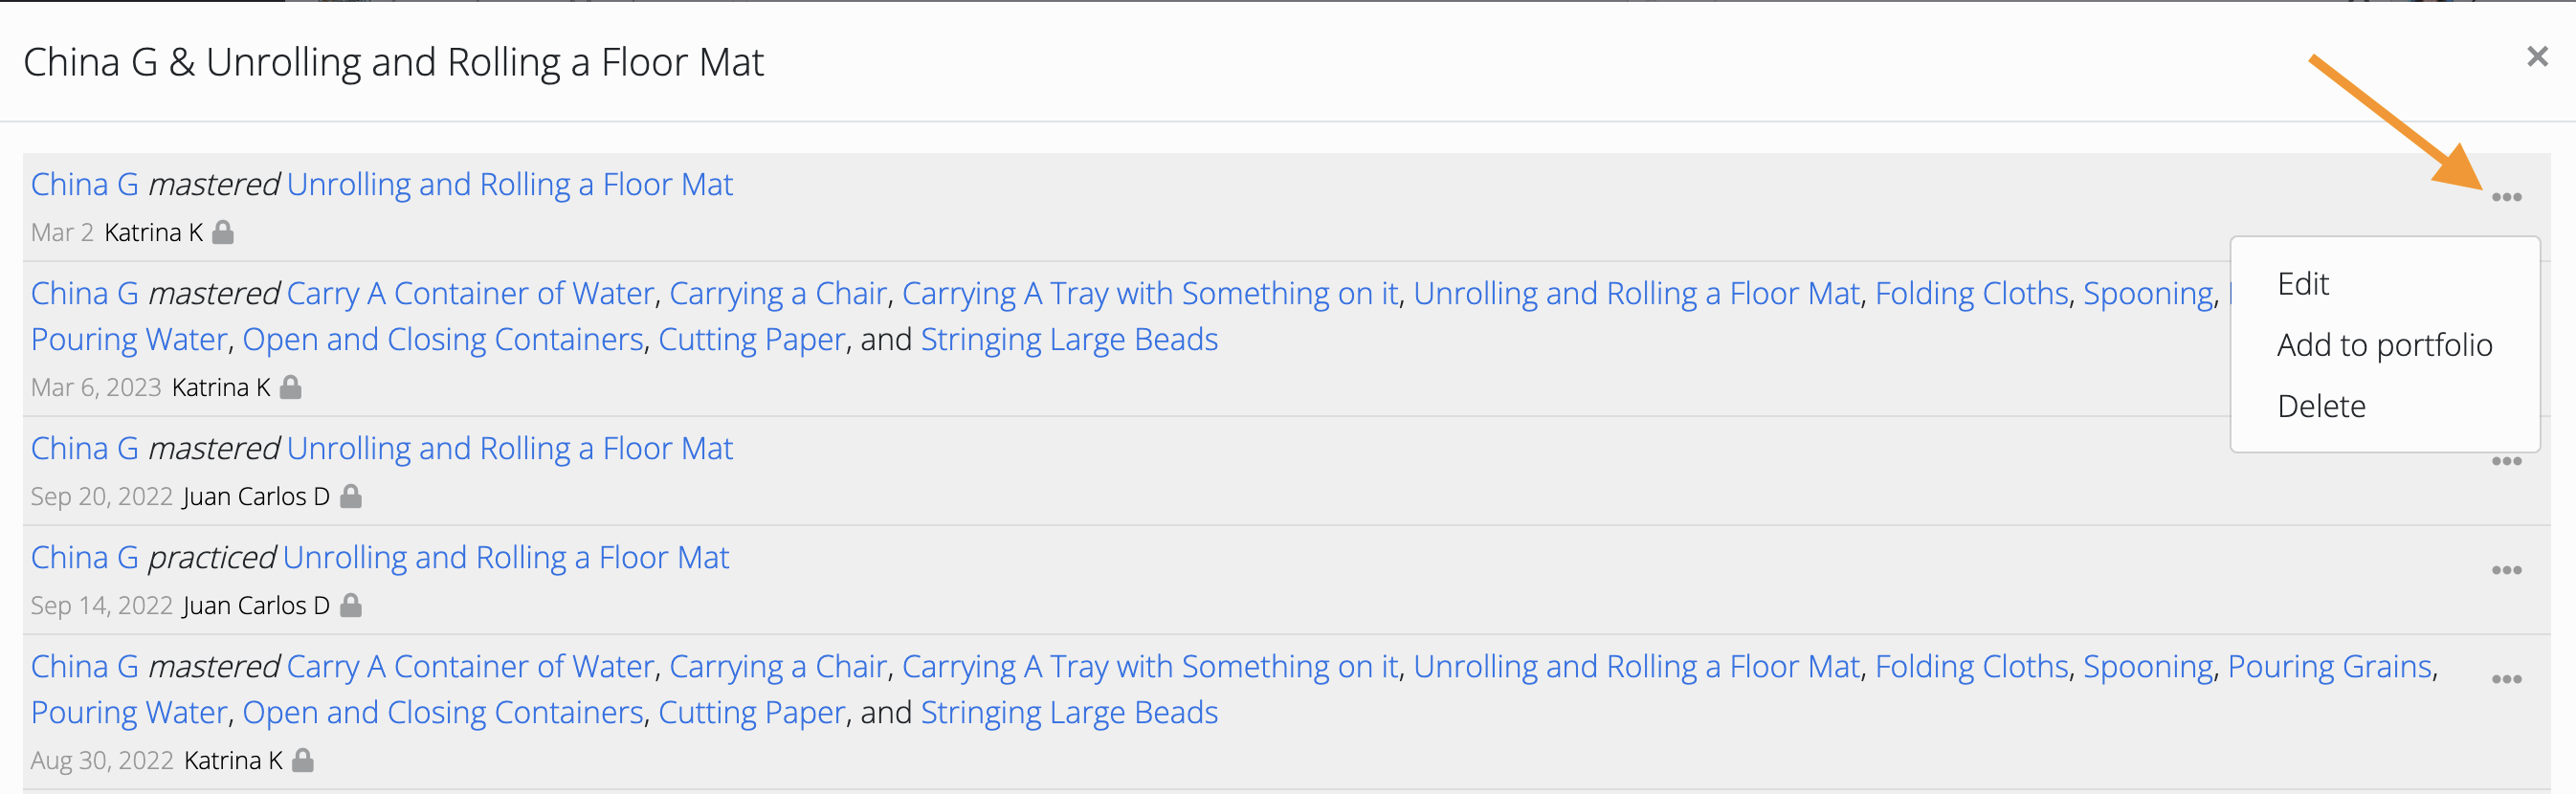
From this page, you can also click [Edit] to add comments or observations to a presentation or share it with parents (unlock) or make it private (locked) from parents. Once you are finished editing, click [Save].

Flagging Lessons You Plan to Give
To switch from [Record] to [Plan] mode, click on [Plan] in the lower-left corner of your screen, right next to [Record].

Black flags in boxes represent lessons you have planned, and blue flags are for lessons that were planned by someone else. More than one person can have access to lesson planning in a classroom, and the lesson planning and record keeping pages will give you the option to see all planned lessons or just the lessons you've planned.

Make sure to [Save] before leaving this page. Once you do, it will send all the flagged lessons to the [Lesson Plan] page. To learn more about lesson planning, check out our Primary or Elementary Lesson Planning tutorials.
Questions?
If you have additional questions or feedback, please send us an email at info@transparentclassroom.com, or click [?] > [Ask] in the bottom right-hand corner of your browser window.